

planetleomars
-
Posts
58 -
Joined
-
Last visited
-
Days Won
1 -
Speed Test
My Results
Posts posted by planetleomars
-
-
i cant seem to access my canopy after i called the tech support of smart. they said that they are going to something in their end to fix the connection issue and after that, my access to canopy ended,,, WHY?

-
Thanks
You're welcome. im still working on other ways to improve the speed, and disconnection issues... no doubt smart has the fastest speed, it just need to be stable.
-
i'm in a remote location where connetion normally drops out every 5-15 mins and connection is a bit slow.
Before i get 30-50 kbps.
Here's my speed now:
:::.. testmy.net test results ..:::
Download Connection is:: 1036 Kbps about 1.04 Mbps (tested with 1024 kB)
Download Speed is:: 126 kB/s
Upload Connection is:: 167 Kbps about 0.2 Mbps (tested with 386 kB)
Upload Speed is:: 20 kB/s
Not bad for a remote location.
Thanks
-
THIS how you tweak smartbro to be able to get a stable and faster connection
1. Assign the TCP/IP Manually.
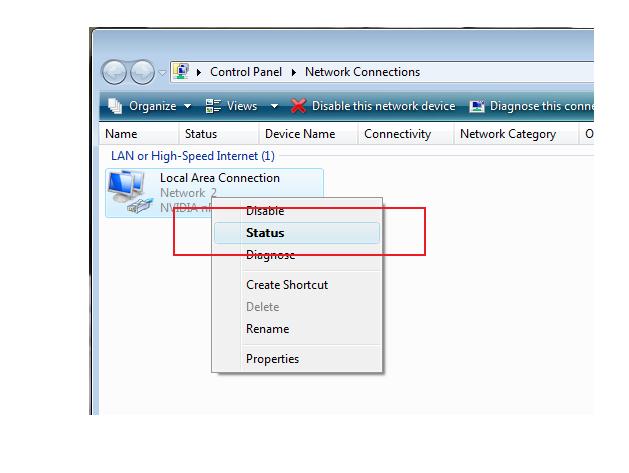
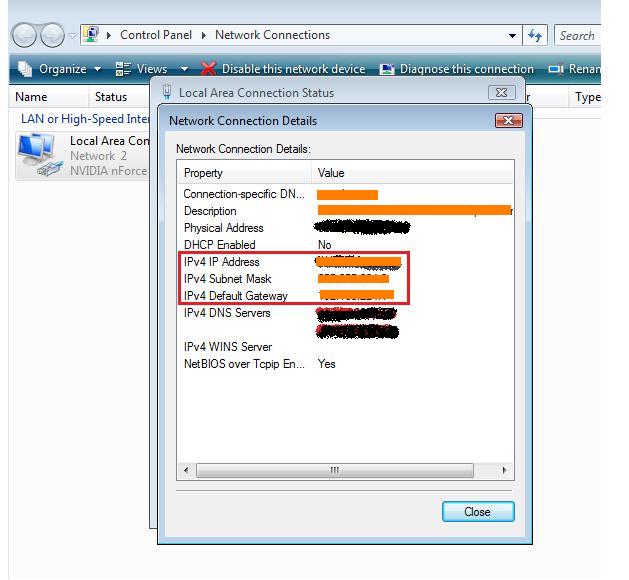
To be able to see what your IP, Subnet, and the default gateway, again go to Control Panel and then look for the Local Area Connection and then right click on it and choose Status and then click Support Tab, and then click Details, and there you will see the complete information of your IP address, Subnet Mask, Gateway, and DNS servers. Now you will have to copy and save those information on a paper or maybe a notepad and save it somewhere in your computer, because you will be needing those information later.
COPY THE IPv4 address, SUBNET MASK, AND DEFAULT GATEWAY.
For Windows XP:
GO TO RUN, then TYPE CMD, TYPE IPCONFIG.And copy the same details.
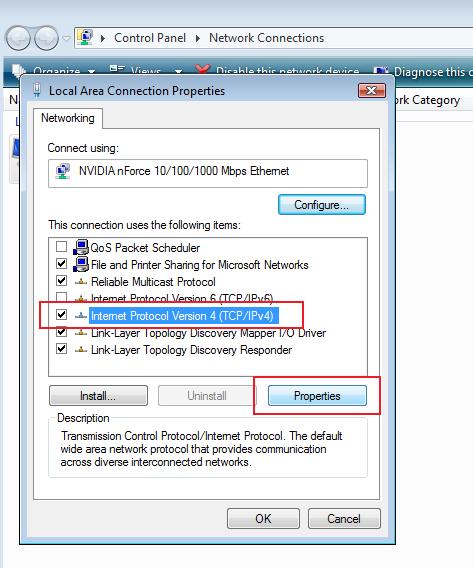
2. How To Change Your DNS Servers?
Step 1. Go to Control Panel > Network Connections > Local Area Connection > General Tab > Properties > TCP/IP.
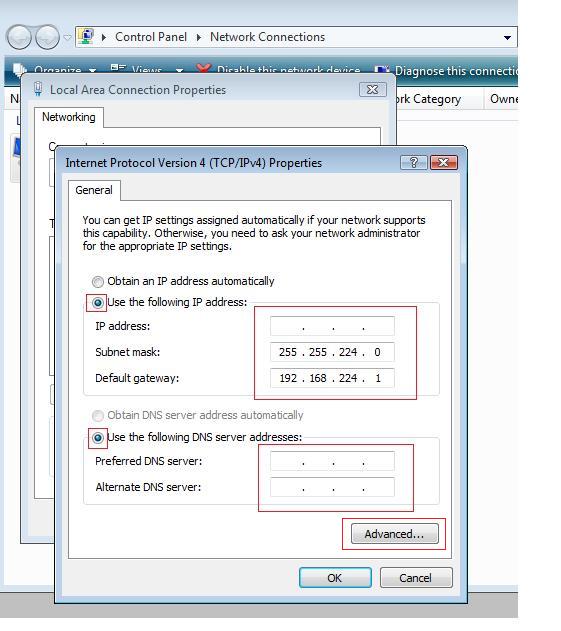
Step 2. Use the information that you saved earlier on each of the respective information. IP address, Subnet Mask, Gateway, and DNS (208.67.222.222 & 208.67.220.220).
Here: type the IP, SUBNET MASK, AND DEFAULT GATEWAY THAT YOU COPIED.
FOR DNS: You can choose on the SELECTIONS BELOW.
Here are the DNS address that i have tried...
1. Google
•8.8.8.8 -PREFERRED DNS•8.8.4.4 - ALTERNATE DNS
2. ScrubIt
Public dns server address:
•67.138.54.100 - PREFERRED DNS
•207.225.209.66 - ALTERNATE DNS
3. dnsadvantage
Dnsadvantage free dns server list:
•156.154.70.1* - PREFERRED DNS
•156.154.71.1 - ALTERNATE DNS
4. OpenDNS
OpenDNS free dns server list:
•208.67.222.222 - PREFERRED DNS
•208.67.220.220* - ALTERNATE DNS
5. vnsc-pri.sys.gtei.net
Public Name server IP address:
•4.2.2.1
•4.2.2.2
•4.2.2.3
•4.2.2.4
•4.2.2.5
•4.2.2.6
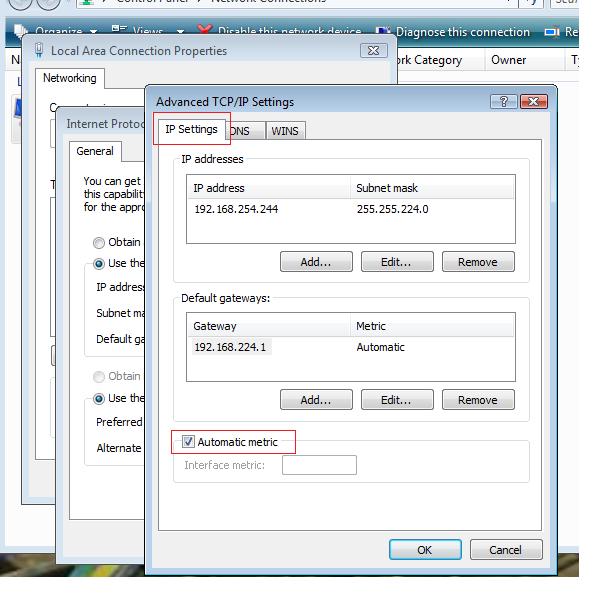
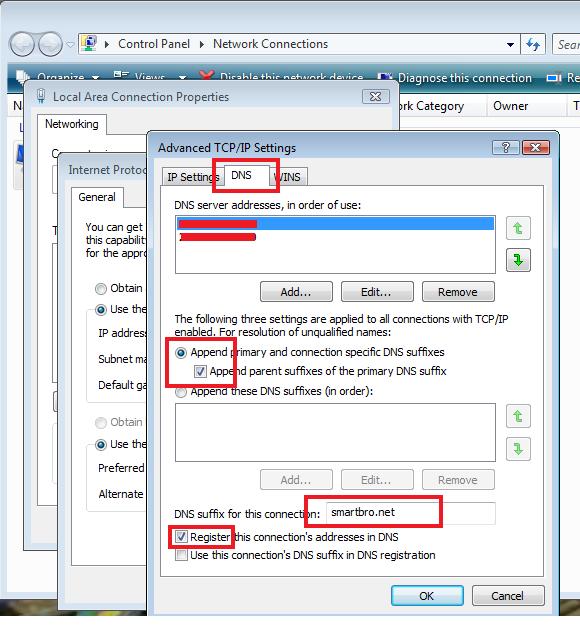
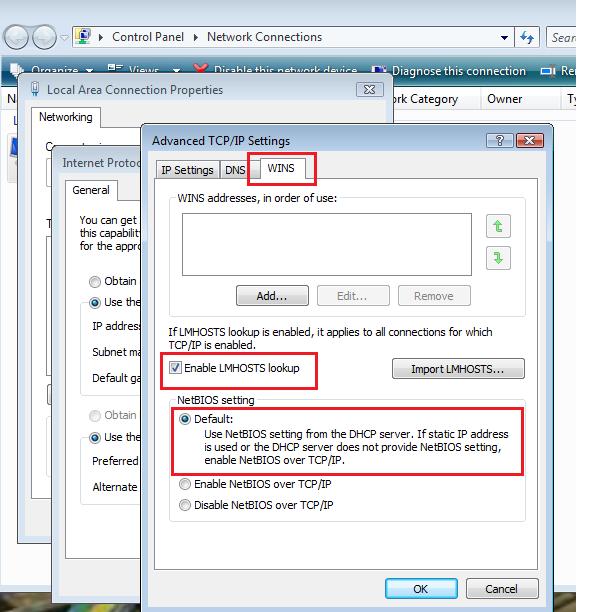
After you TYPED the DNS, Click on ADVANCED on the bottom right. and refer on the steps below.
- just tick like whats in the pic.
- just tick like whats in the pic.
- just tick like whats in the pic.
After all the steps followed., click OK then disbled/ enable LAN.
Step 3. After placing in the right information, double check and then click OK on both Pop Up windows that opened.
Step 4. Go back to Control Panel > Network Connections. Now Right-Click on Local Area Connection and then click Repair. This is to refresh the connection and DNS servers that your connection will use.
Step 5. Now you can check the difference of the speed through www.testmy.net and compare what difference it made since using the default DNS servers of your Internet Provider.
I HOPE THESE WILL HELP YOU GUYZ.


How To Tweak Smart BRO WiFi
in Smart Bro (Wi-fi)
Posted
try to read my post, we cant blame smart if our connectoin would drop out occasionally... canopy just need more height and proper connection configuration,because sometimes - too much traffic in the base station(tower) kicks us off.
Here: